

Many of us who take pictures have traveled to beautiful places, took photos, and returned home only to find that what we experienced at the picturesque site was nowhere to be found in the photos we took. I remember going up the California coast once from Santa Barbara to Monterey taking photos of some of the most beautiful coastline in the United States only to discover later that not a single photo I took was worth keeping. The result was a feeling of despondency, wondering why I even tried to take pictures. Years later, I learned that taking a decent photo is not so hard. With the application of a few simple rules, that will become automatic with practice, photography can be an enjoyable pastime with pleasing results.
In the paragraphs that follow I wish to share a few of the techniques I have picked up that anyone can use. Many of these tips can be found in a thousand articles already on the internet, in magazines, and in books. So, if you are a practiced photographer, you will find nothing new here. If, however, you do not regularly read articles on photography, this one may be of value to you. I hope so.
Here are the tips.
You may read this article by continuing below, or in presentation mode. To continue in presentation mode follow this link. To return to this page use the back arrow in your browser.
1. Use the rule of thirds.
The “rule of thirds” is probably the most recommended technique for making better photos. For that reason I am making it number one on my list. Here is the technique.
Visually divide the scene into thirds along the vertical and horizontal axes. Place the subject or subjects of interest at the intersection points. Below is a photo of the Great Wall of China. With regard to the rule of thirds it makes a fundamental mistake insofar as the tower, which I wanted to be the focal point, is placed in the center of the photo.

Breaking the scene into thirds, as shown below, we can easily see that the image breaks the rule of thirds.

Re-framing the photo by moving the tower to the left produces a photo that looks much better.

Once again, dividing the scene into thirds reveals why this photo is the better of the two. Placing the points of interest along, or near, the dividing lines is more pleasing to the eye.

2. Include a foreground when possible for scenic shots.
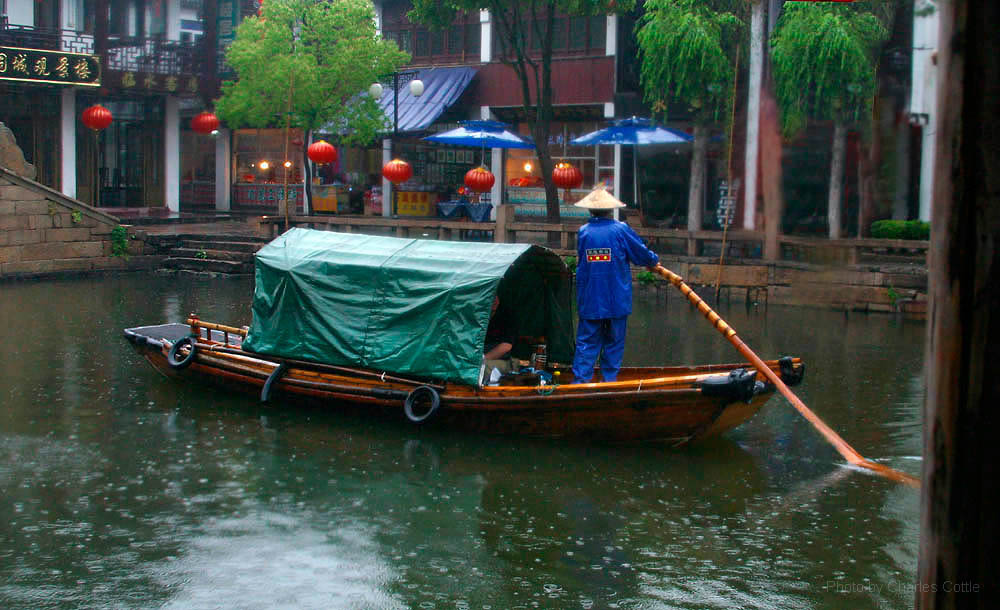
Often when taking photos of a scenic location, we tend to focus only on the main point of interest, forgetting the surrounding details. This is normal as we are unconsciously drawn to the interesting subject. For photography, however, the tendency produces rather flat photos. Consider the scene below. It is a pleasant snapshot that accurately documents the photographer’s presence at the location. I have intentionally removed the foreground so that the it may be compared with the one that follows.
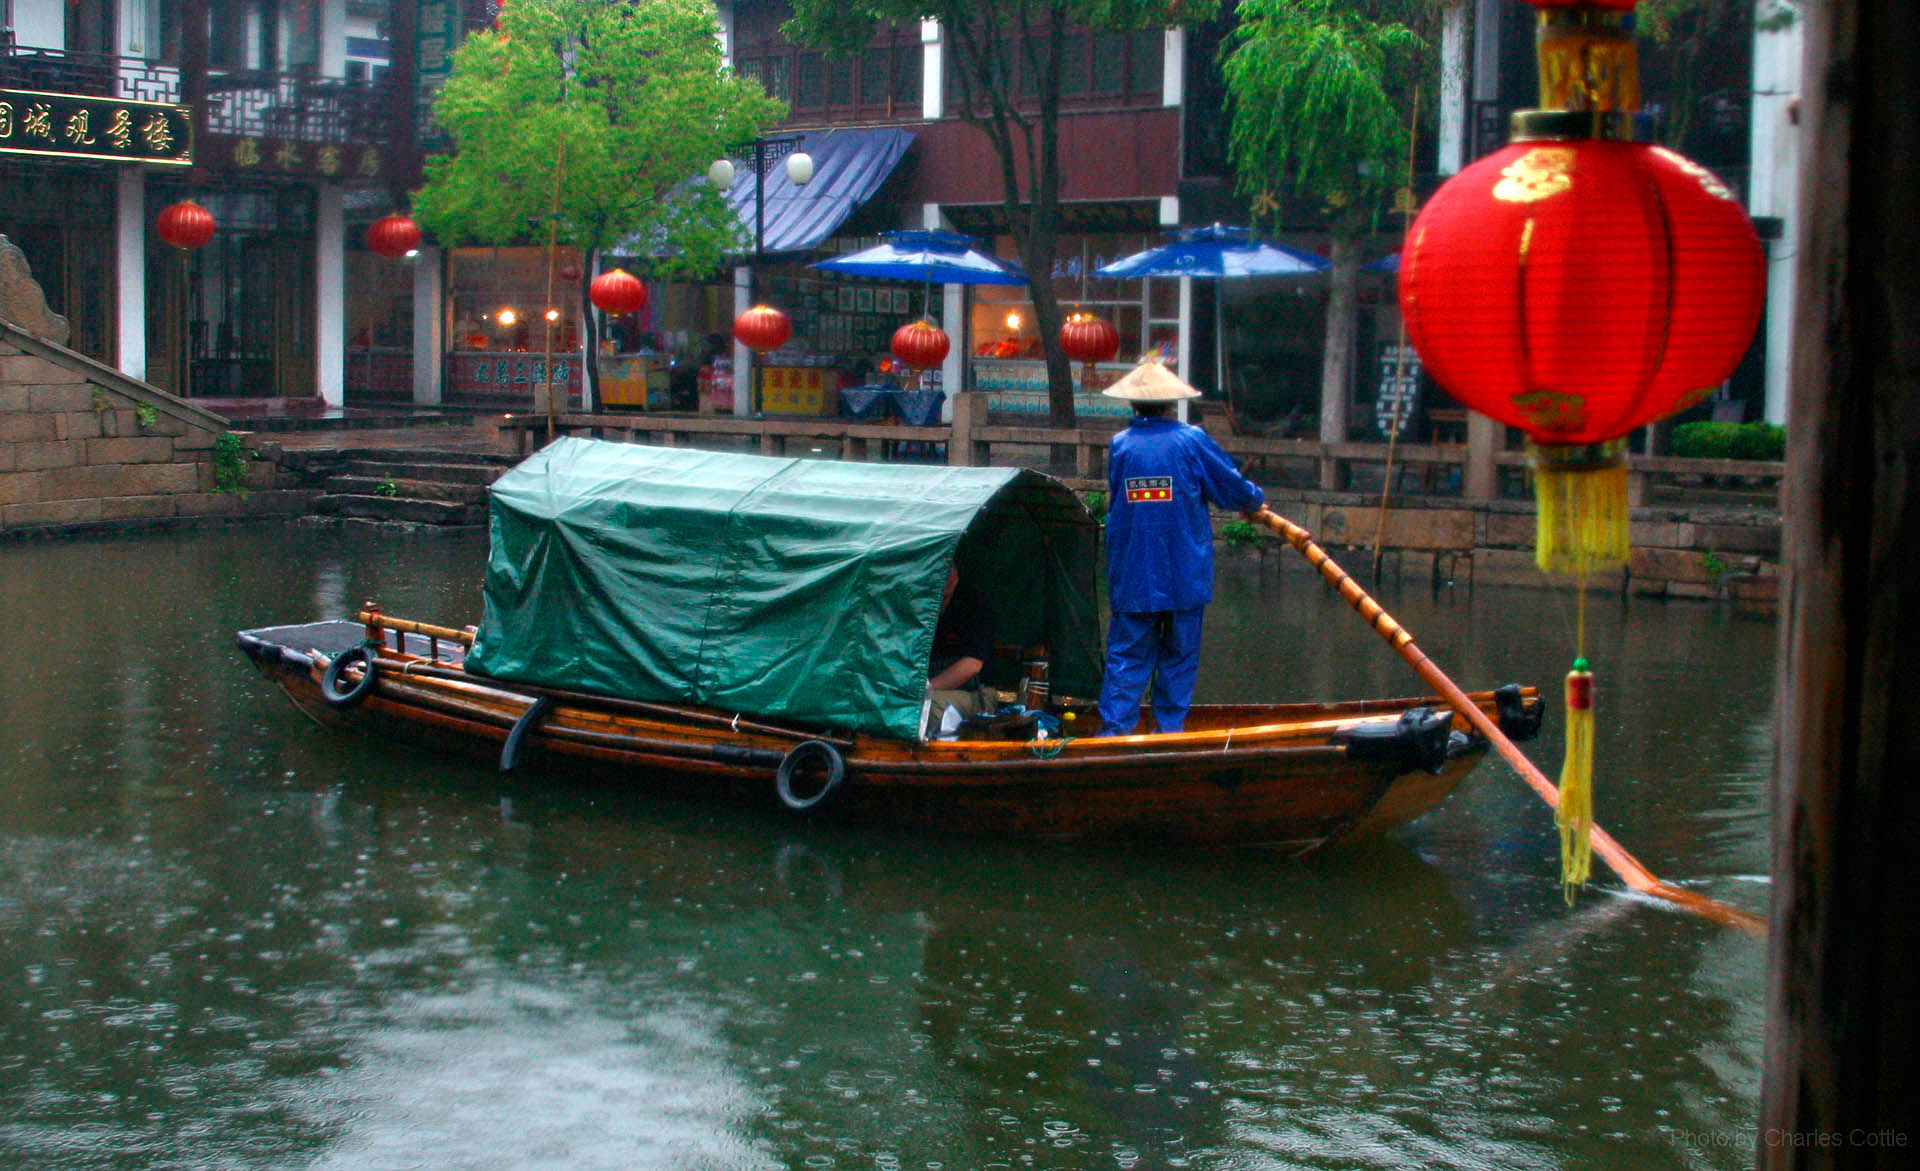
Including the lantern in the foreground, as shown below, makes a much stronger photo visually. To my eye, the photo below contains a sense of depth that is lacking in the one above. It is also a bit more colorful.
3. Lead the eye with lines that move through the picture.
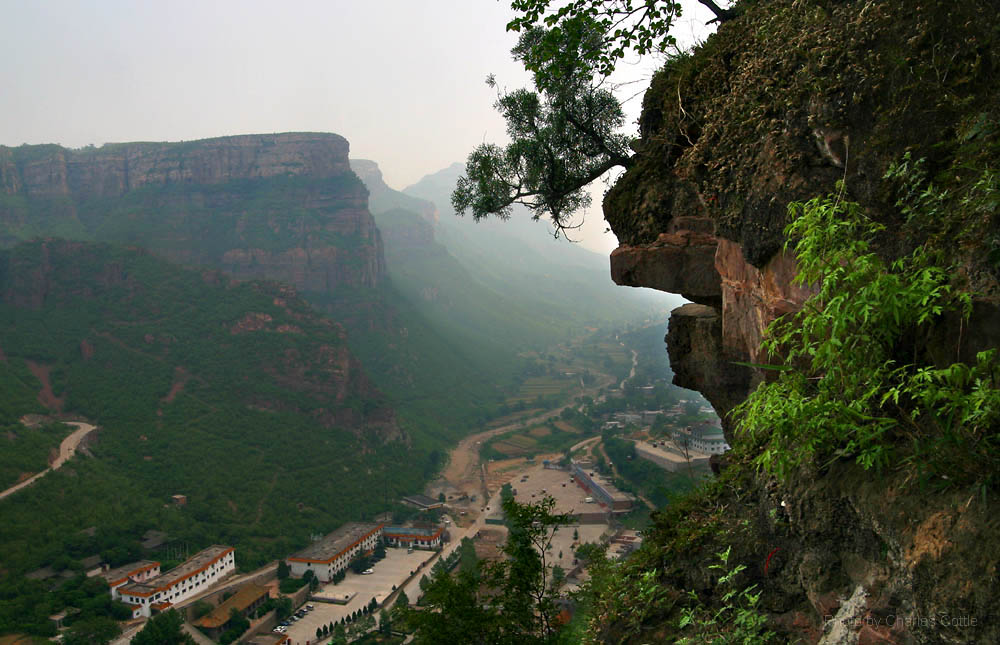
Taking advantage of the leading lines in a scene will give the photo it a sense of depth, creating a visual space worthy of exploration. Each of the photos in the gallery below uses this technique. You may click on any photo to see the original image.


4. Look for patterns.
Patterns in a landscape, similar to leading lines, enhance a photo. Agricultural scenes frequently reveal beautiful patterns created by farmers who, although acting alone, produce a tapestry of beauty when their efforts are combined with many others. The following two photos from Yunnan Province in China illustrate this idea.


The following photo from the city of Oaxaca in Mexico captures the repetitive pattern of hats created by members of a dance troupe at the Guelaguetza, an annual ethnic culture festival celebrated in the city and throughout the state.

5. Avoid Clutter.
Sometimes we get taken in by the beauty of a scene. We rush to take a photo, and when we get home, we discover that we never saw the clutter that ruins the picture. We see selectively, but the camera does not. It records what we ignore, usually to ill effect. When I took the photo below of Cathedral Rock in Sedona, Arizona, I was sure I had a masterpiece, or at least a good landscape photo. Unfortunately, I completely ignored the branches right in front of my eyes because I was too focused on the rocks in the distance and the reflection of them in the stream. The result is a completely forgettable photo.

In the photo below at the same location most of the clutter has been eliminated simply by choosing a different view. The tree that spoiled the photo above is still seen at the upper right hand side of the photo. It is still a distraction. Also, I lost the reflection in the water that I liked in the photo above. So, this photo is still not the masterpiece I was seeking, but it is better than the one above.

There are many fine photos of Cathedral Rock on the Internet. The successful ones manage to avoid the clutter that I found troublesome.
6. Control the depth of field.
The depth of field in a photo refers to the area in focus from near to far. If both near and far objects in a photo are in focus, it is said to have a long depth of field. If on the other hand, objects in the photo are in focus for only a short range while the rest of the photo is blurred, the photo is said to have a short or shallow depth of field. Generally speaking, landscapes will benefit from a long depth of field while portraits tend to benefit from a short depth of field.
The depth of field is controlled by the size of the aperture used when taking the picture. Small apertures produce long depths of field and large apertures produce short ones. It is also true that wide angle lenses produce longer depths of field while short depths of field are produced by telephoto lenses. Most cameras nowadays have landscape and portrait presets. When you choose one or the other, the depth of field is automatically adjusted to accommodate the kind of photo you are taking. Choosing the proper preset on your camera is all you need to do to take care of the depth of field issue. If, however, you want a bit more control, you can put your camera into aperture priority mode and choose a small aperture for landscapes (e.g., f 16 or f 22) and a large aperture for portraits (e.g., f 4 or f 2.8).
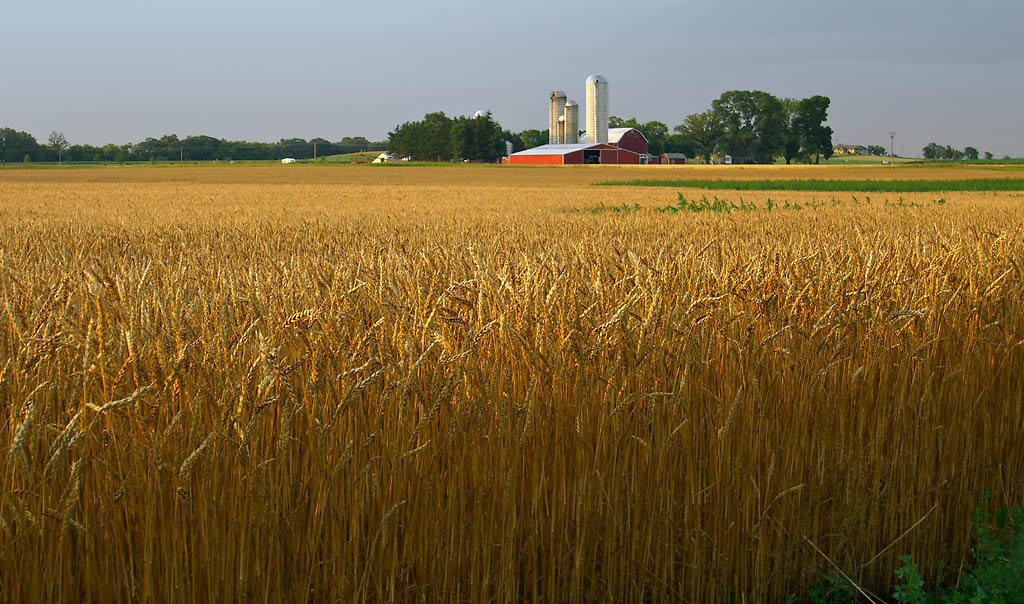
The two photos below illustrate the different effects of controlling the depth of field. In the first photo the wheat in the foreground is sharply in focus and so is the barn and buildings in the distance. This is a long depth of field.
The portrait below is of Lucho, a weaver of fishing nets. The area immediately behind Lucho is out of focus. Thus, the photo exhibits a shallow depth of field, and the eye naturally falls on the illuminated details of the his face. I could have taken the same photo with a long depth of field, but the shorter one produces a stronger photo.
It is important to note that the use of short depths of field for portraits is only a guideline, not a hard and fast rule. There are occasions in which one might prefer a longer depth of field for a portrait. If, for example, I had taken a portrait of Lucho in his workshop weaving one of his fishing nets, I would have opted for a longer depth of field to put in focus the objects around and behind him, thereby capturing a sense of the environment in which he works.

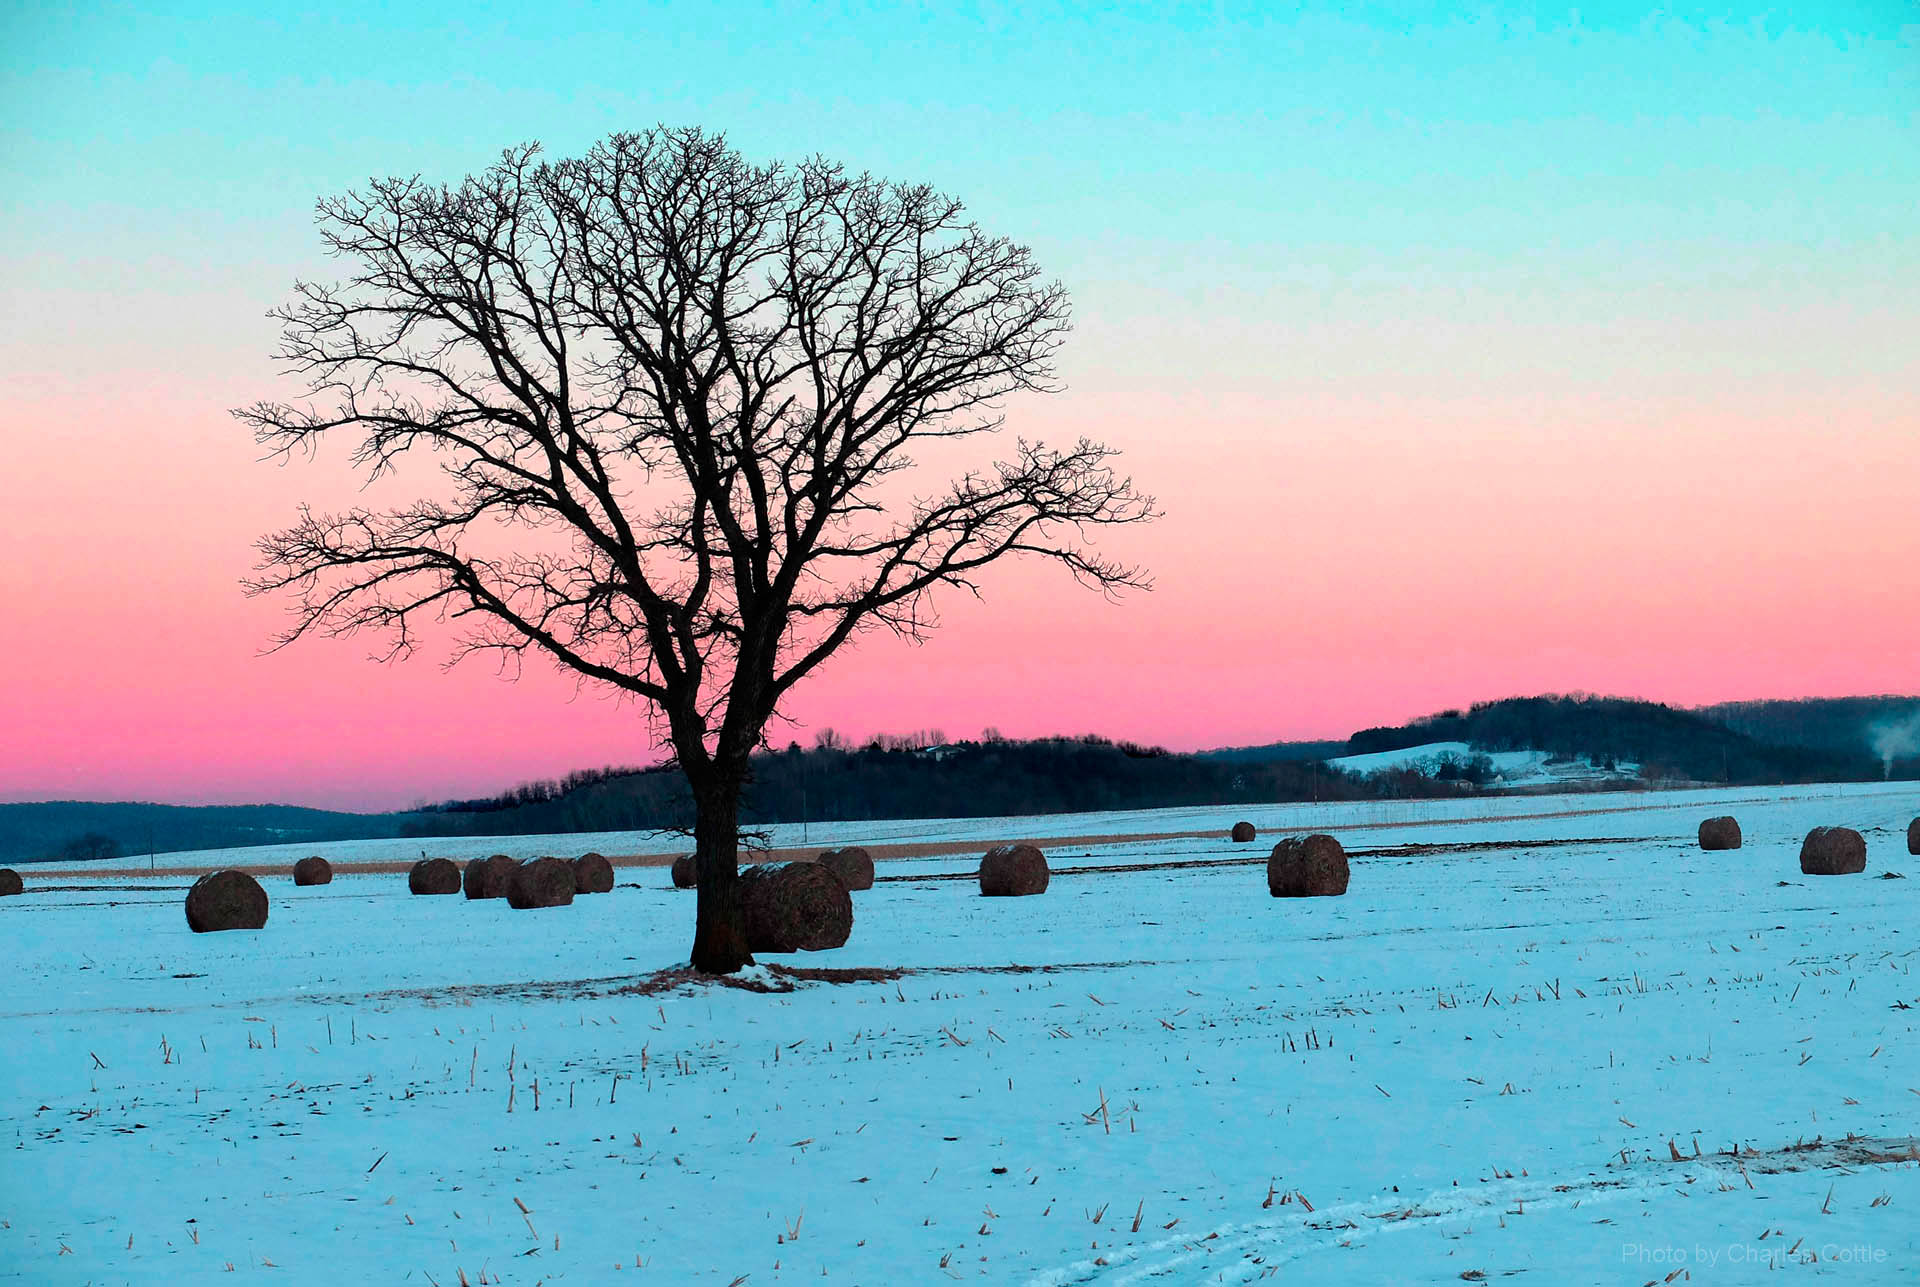
7. Take advantage of early morning and late afternoon light.
Landscape photographers generally recommend that you take landscape photos in the early morning or late afternoon because the midday sun is harsh and casts unattractive shadows. That usually means before 10:00 a.m. and after 4:00 p.m. In contrast, the early morning light is clear and bright, and afternoon light is warm and golden. The following two photos were taken in the late afternoon. The first photo, from Montana, was taken in July. The second was taken in Wisconsin in winter. Either of these scenes photographed in the middle of the day would have produced forgettable results.

8. Use water to enhance outdoor scenes.
Water can do wonders for photos. A thoroughly boring scene can be transformed with water, often creating a dimension of color and reflectivity completely missing without it.
The night view below of Fort Atkinson, Wisconsin on the Rock River makes use of the reflecting lights on the water to create what I think is a pleasing photo. The full moon behind the clouds also helps.

Rainy days often spoil our outdoor activities. But photographers can take advantage of the rain to create beautiful photos. In the following scene I managed to catch the moment when two groups of people approaching each other merged in the plaza below. Fortunately, most carried colorful umbrellas whose reflections enhanced the photo as they cast reflections on the wet cement.

Water can enhance more than scenes and landscapes. The close-up view below of a wild rose is much improved by the droplets of rain water on the petals and leave. This is an example of another rainy day creating a good photographic opportunity.
9. Look for color.
Sometimes we forget just how colorful the world is. Looking for small splotches of color in a monochrome visual field often leads to good results. Butterflies almost always add color to a background of green vegetation, thus making an aesthetically pleasing photo.

Flowers, especially close-ups, often make attractive photographs. I was drawn to this daisy because of the green background, the stark white of the petals, and the orange center. I was also fascinated by the arrangement of the disc florets that move in a spiral around the green right in the exact center of the flower.

10. When photographing children, get on their level.
Taking pictures of our children and grandchildren is a wonderful activity. To make these photographic memories even better, I suggest getting on eye-level with the children we photograph. As an example, consider the snapshot below. It is a pleasant photo of two attractive children. But if I had taken the time to get on their level so they were not looking up, the photo might have been much better.

Now, consider the photo below. This young girl had just been swimming when she came on the scene. This photo is better than the one above largely because I brought the camera down to her eye-level allowing me to capture a natural smile and the light in her eyes.

That concludes the ten tips for better photos. I hope you have found this article useful. Your comments are encouraged.

Well done article Richard. Great tips and amazing photos to illustrate them. Your travels have brought you to interesting people and locales. Thanks – Bruce (from Vancouver Island, British Columbia)
LikeLike
Thanks Bruce for the kind comment.
LikeLike
Thank you! These are useful tips. Sharing!
LikeLike
Thanks Karen.
LikeLike
Excellent tips.
LikeLike